- Home
- Project Playbook
- Home Design Concept
Your Concept Design
Introduction
Your concept design stage is the first stage in your home design process.
A concept can be defined as a principle or an idea, a plan or an intention. In fact it's all of these rolled together. It's the design phase where the spirit and essence of your new home is first captured.
The conceptual design stage is where your design starts to evolve to...
- grapple with where to build your home on your site and how it will fit with it's surroundings.
- define the basic shape and appearance of your new home.
- figure out the organization of the spaces inside and outside your home.
All this while taking into account your budget and all the other information you've gathered so far in your home project playbook.
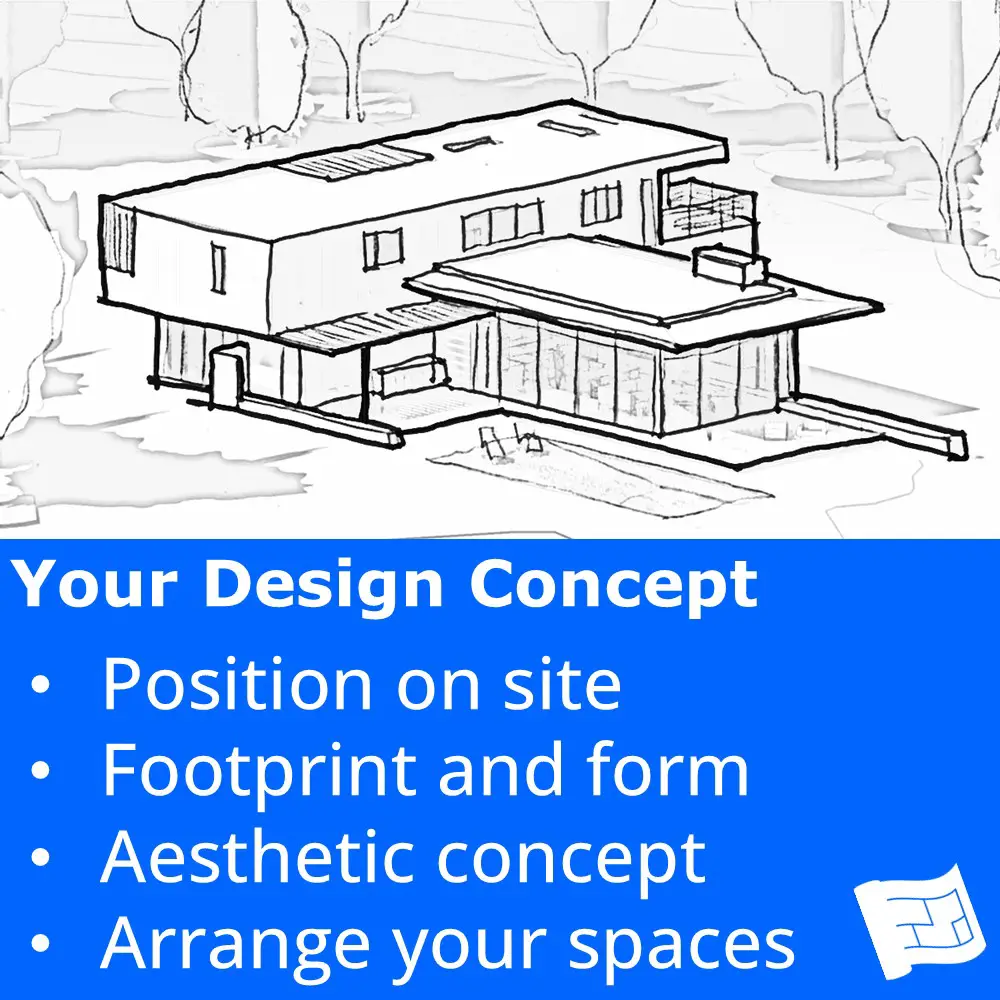
Here are the steps in the Concept Design topic...
In order to write this page I had to choose an order to put the topics in. In reality though, then all feed into each other. Remember the iterative nature of the design process?
At the end of your concept design process, you'll have some important pieces of work done:
- Site plan showing location and footprint of your home and outdoor areas. This might only be a sketch at this stage.
- Sketches or picture of exterior style of your new home.
- Bubble diagrams showing indoor and outdoor spaces.
- A validated budget (appropriate for this stage of your design process)
Once these are in place, run through the checkpoint steps at the end of this page. Then you can progress onto your design layout - your floor plans and elevations.
You may find it useful to read ahead all the topics in the design stage. Knowing what you're aiming for eventually can help give direction to your concept design phase.
Where to Build on your Site - Siting
Introduction
For some of you, the location on your site for your home will be pretty obvious.
For those of you with acreage, the decision about where to site your home should be carefully considered.
Either way, I'll take you through the things to consider when you're deciding whereabouts on your site to build your new home.
Your home is going to permanently alter the place where you plan to build it. Make it a priority to design a home that will contribute to the beauty of your site rather than detract from it.
Learn how to read site plans so that you can interpret your site plan and participate in decision making.
It's important to do a full site analysis (coming soon) the the point below are the first ones to consider.

Tips for budgeting during concept design
Here are a few tips for preventing you busting the budget in your concept design phase:
- Look at areas of the site which will have the least complex foundations.
- Look at areas of the site which will require the least amount of ground works.
- Avoid slopes greater than 20%
- The main way to keep your costs down is to build a smaller home.
Where can you build?
Whereabouts on your site can you build?
First of all, take a look at the zoning rules for your site. Any setbacks and easements will be marked on your site plan. This will give you an area upon which you can build. Don't forget to keep any permitted encroachments in mind as well.
The other thing to consider is your soil conditions. Your soil conditions might be such that they will be expensive to build on (eg there's lots of rocks to clear) or that they're not suitable to build on.
When you have decided where to place your home on your site, if your builder or design professional recommends a soil test, this is a good time to get it done because you know exactly where you're planning to build.

Don't build on the best patch
So, you've found the best spot on the site - it's flat with great access to the sun and to the views. Before you decide that this is the perfect spot for your new home, consider these points:
- If flat land is in short supply on your site, perhaps the flat portion of the site is the best place for your outdoor living space and your home would be better built on the slope adjacent to the flat part of your site.
- If you find places on your site that make you want to pause and site for while, your first reaction is likely to be that this would be a great place to build your home. Before you plow ahead with this idea, pause to think about what it would be like if this spot were observed from inside your home - somewhere to look at, rather than somewhere to build on.
Orientation
As well as the location on your site, equally as vital is your site orientation. If you haven't already, please, please, please don't go any further before you've learned about orientating your home with respect to the sun.
Orientation has a huge impact on your access to light in your home, and the energy efficiency of your home.
Access
Where is the best place to access your site? How will you get from the street to your home in the car and on foot?
Make sure you can see both ways down the street from your driveway to make pulling out from your home safe.
You might find the topic on how to create curb appeal interesting.
Views & privacy
What views are available in the near, mid and far distance and where are these available from on your site? Which areas of your site are the most private and the least private?
Are there opportunities to introduce features to your site to create a pleasant view? (eg plant a tree)

Site repair
One thing you might consider is the concept of site repair. Are there any areas of your site which aren't in the best condition? If so, consider siting your home there as that will have the effect of repairing your site.
While this is a great idea in principle, I think orientation and views and privacy should take precedence.
Siting examples
Let's look at a few examples of siting. If you're not used to looking at site plans, have a read of how to read site plans first.
I have included links to the finished homes, but really try and interpret the site plans before you take a look at the finished homes. After all, with your own home, you'll be reading a site plan before you see your finished home!
See if you can spot the principles of orientation, views and privacy and access at play.
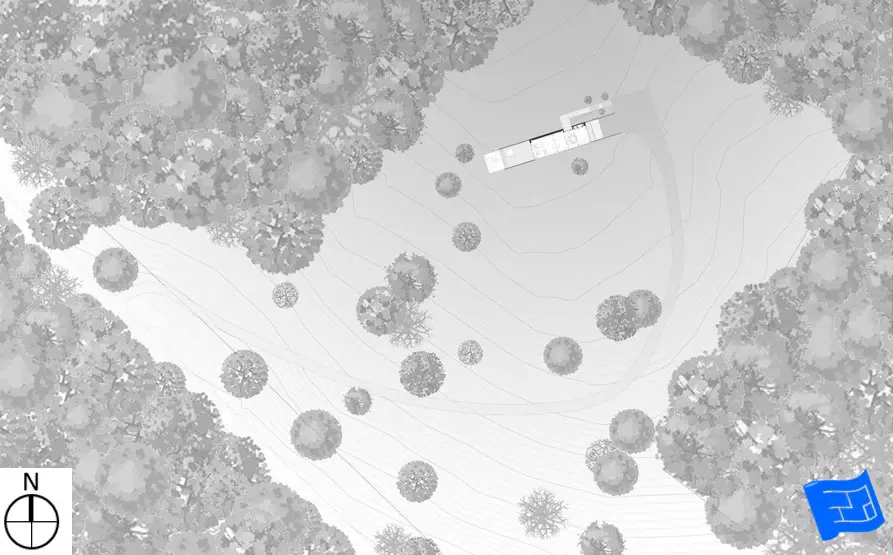
In the image below you can see that the home is placed nearly on top of the outcrop with the land falling away at a wide angle - probably 225 degrees around the property. The view and the orientation to the south line up nicely with the access curving gently up towards the house.
See the completed project - Bank Barn by Birdseye Design
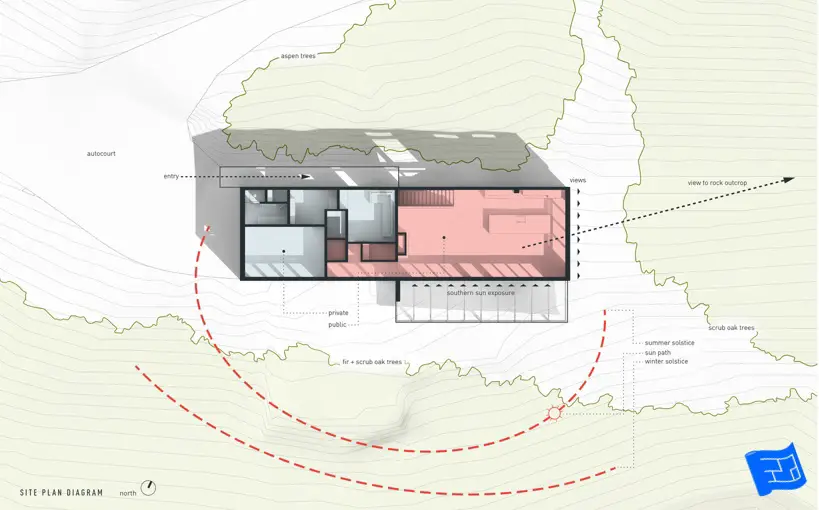
In this next example, this home was placed on the same site as the former home which was razed. The siting of the new home was very different because the siting depended on the height of the living spaces, which needed to be on the second floor in order to take advantage of the views to the east.
The living space also needed to be open to the sun to the south.
To see the finished home, check out the Black Magic House by Rowland+Broughton Architecture.
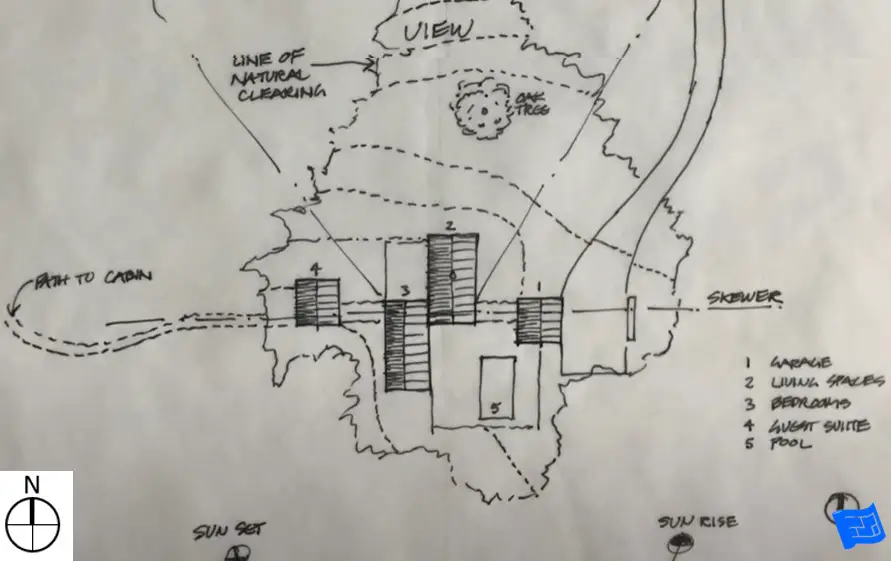
This property sits on a gently sloping site where the separate buildings that make up the home are arranged along an axis or skewer.
There's a view to the North and the Sun to the south and you can see the access driveway coming in from the top right of the sketch. And notice that this is a sketch rather than a formal site plan.
Here's the finished house (more like a complex!!), Upstate House by Eponymous Architecture.
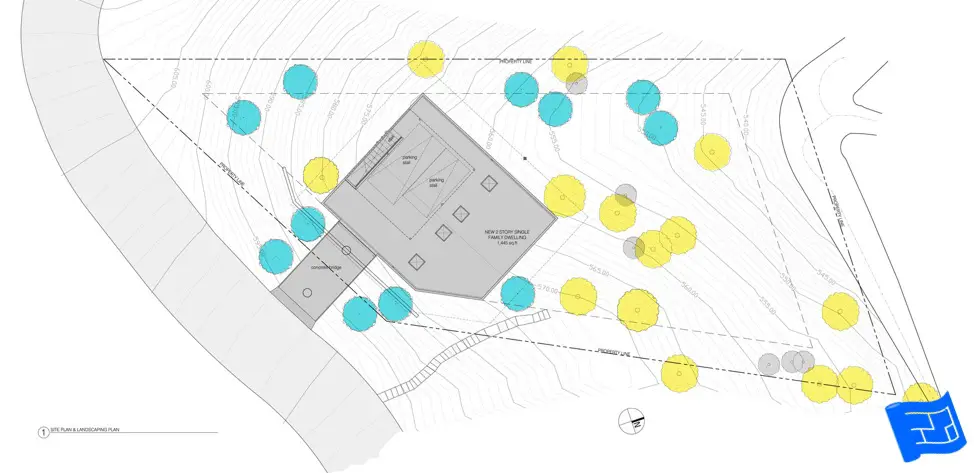
In the next example, you can see how the shape of the site and associated setbacks dictated the shape of the home to some extent. The idea of this home design concept was to fit the largest rectangle possible, with one corner cut off.
See the finished Car Park House by Anonymous Architects
Video resources
So, to continue your 'Netflix' for homeowners experience....
This video from 30 x 40 talks about how to site your home.
This video shows how a site can shape the design of your home.
Footprint and Form
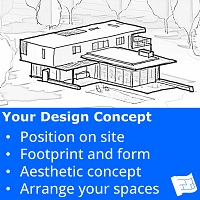
Now that you know where you’re going to build your home, the next thing is to start to figure out plan out the concept for the shape of your home. This includes the footprint of your home (the area it takes up on the ground) and the shape and size it will be, including the height. It’s important to consider the footprint of both the indoor enclosed and outdoor space that will make up your yard or garden.
Remember that the idea at the concept design stage is to figure out the rough idea for the shape of your home, not to have all the rooms laid out with dimensions.

Where's the parti?
Architects often use the word parti to describe the initial ideas of footprint and form, what the building will look like, in plan or in elevation or both.
A parti diagram is the sketch of an idea of footprint and appearance which is an initial response to the site and the program of spaces. It's a sketch of the general design direction and strategy.
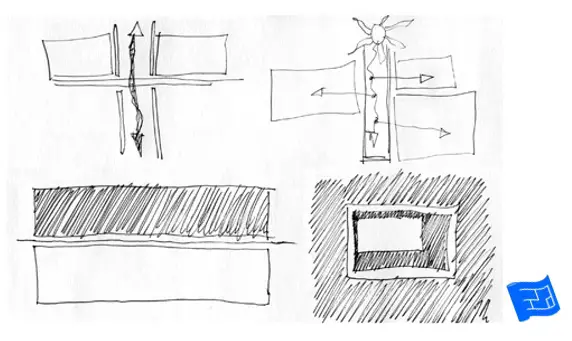
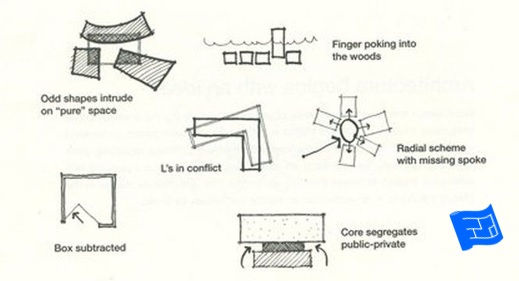
When the view is everything, you can arrange the rooms to face the view.
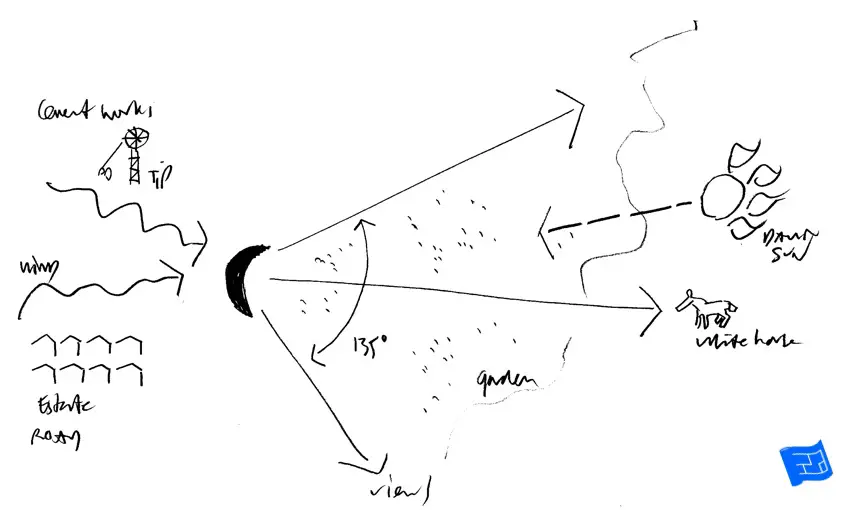
This home by Make Architects in the shape of a crescent is a really nice example and it includes some graphics of the site plan and partis.
The home is in the shape of a crescent with all the rooms facing the view and the sun and away from the cement works and the wind.
Many of you will have images collected which give an idea of the style of home that you’re planning to build. Have those images to hand for this stage of your project and make sure you've passed them on to your design professional.
Take a look lower down at ideas for where to build your addition or extension if you're going down that route.
Videos on developing a concept
If your new home is going to have a unique design this video by 30 x 40 on how to find architectural ideas can really get your juices flowing.
Cove House
This video shows how the design concept for Eric's Cove House project was developed.
In this video Eric talks about how the Cove House concept starts to evolve further.
Aesthetic Concept
The design concept stage is a good time to start thinking about the aesthetics of your new home.
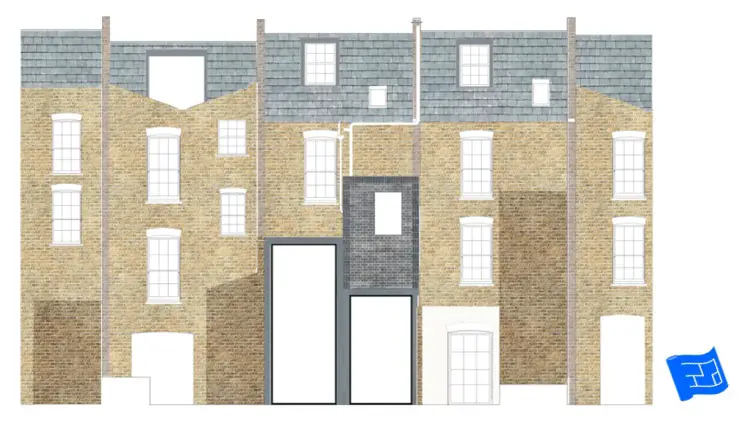
Aesthetics (a posh word for the way your home looks) are to do with the layout of the elevations or facades of your home which is to say the layout of the walls, windows, doors and roof and the materials used on the exterior of your home.
You should have some good photos in your vision boards to inspire your style and material choices.
Given than you have an idea about the shape of your home, you may be able to draw some rough sketches of what the exterior of your new home may look.
Your home design may be driven more by the facade you're aiming for, or by your room layout, it just depends.
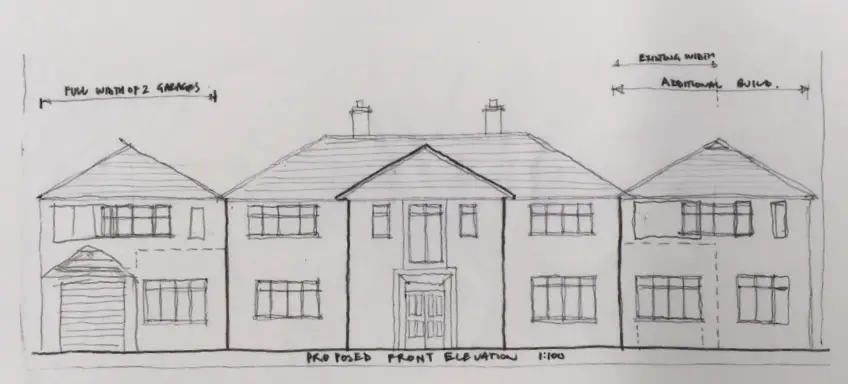
Here's an aesthetic parti from (aptly) Parti architects which gives some idea of the materials that will be used.
More examples and resources for your aesthetic concept
If you want a bit of a laugh at some good examples of what to avoid aesthetically. Take a look at Kate Wagner's McMansion Hell.
This video by 30 x 40 on humble materials is a great essay on how inexpensive materials can be put to use in modern spaces.
In this next video he talks about his favorite materials.
Here he talks about telling a story with materials
And choosing materials...
And here he deals with joining materials
Arrange Your Spaces
Now it's time to arrange your spaces using bubble diagrams.
You'll be arranging spaces still at a conceptual level. It's all about where the spaces are in relation to each other rather than their exact location and dimensions.

Just in case you were thinking of skipping bubble diagrams
You might be tempted to jump straight into drawing a floor plan, but bubble diagrams are a much quicker way of experimenting with organization. If for some reason, you hit a problem fitting the organization you plan on your bubble diagram into the floor plan, the work you’ve done during the bubble diagramming step will help you solve the problem.
Design concept example
30 x 40 Design Workshop is the one man architecture practice of Eric Reinholdt. He has a You Tube channel that's largely aimed at architects but you can pick up lots of knowledge from watching his beautifully made videos.
All his videos concern acreage projects built in a barn style, and though this may not be the style you're planning for your home, you can still learn an enormous amount for your own project.
The organization of the videos on Your tube can get a bit frustrating and he's also got so many videos. To save you time and focus your viewing, I've curated the videos that you'll learn the most from.
The videos I've selected for you are sometimes stand alone tutorials and others form a series of videos following the design and build process for a particular project.
Modern Longhouse
In this video, Eric talks about his own home - The Longhouse. It's only two videos but the first video is a really good demonstration of the thought process that goes into siting your home on your land.
In this next video he talks about the the organization of the floor plan and the impact that the plan has on making his home more affordable to build.
Checkpoint
Introduction
Before progressing to the next stage of design, it’s good practice to make sure that you’re happy with the way your design is progressing. And it’s also important to check that you’re heading towards a design that is feasible to build and that you can afford with your budget.
There are always many ways that a design brief can be solved so you should have several concept designs to review. I'd suggest no more than five and three is probably ideal.
It's best to evaluate all the options at the same time...
- Comparison can be a very valuable tool in evaluating your high level design concepts.
- Evaluating options one by one can slows the design process down.
- If you evaluate only one option and cycle through more design options than your designer planned on, this may mean your designer charges you extra fees.
Just to recap - these are the pieces of work for the concept design stage that you'll carry forward to the next design stage - layout design.
- Site plan showing location and footprint of your home and outdoor areas.
- Sketches or picture of exterior style of your new home.
- Bubble diagrams showing indoor and outdoor spaces.
- A validated budget
Siting
- Are you happy with how you've decided to site your home? Consider access to your home, orientation, access to light, trees and views and privacy.
- If a soil test is necessary, has one been carried out?
Spaces
- Are you happy with the arrangement of spaces both indoors and outdoors?
Aesthetics and style
- Are you happy with the form of your new home, and any style or materials suggested by the concept design?
Is your design concept aligned with your Mission Statement in your Design Brief? Is it aligned with the climate guidelines that apply to your project?
Budget review
Since we are still at a concept stage, it’s still too early to create a budget based on quantities. Is there any new information that could be fed into your budget estimation? Does your builder think anything in the concept design indicates a higher cost per square foot that you have been working with? Is the size of your home still in line with the size you used to do the initial estimation?
To cut a long story short, check your budget in the greatest amount of detail that you can at every stage of your project, before you progress on to the next stage.
Energy Review
If you are aiming for an energy or sustainability standard for your new home, check, or have your energy consultant check on your behalf, that the design is in line with the requirements to achieve the energy standard you're interested in.
Construction review
At this stage it's important to check in with your builder and if necessary a structural engineer to see that the concept design is feasible to build. In particular consider:
- Foundation
- Spans
- Major openings in floors
- Wind bracing walls
You don't have to work out all the structural requirements now. The idea here is to spot anything about your home design that might make it more complicated to build (and therefore more expensive).
Planning review
You will have taken your zoning rules into account when designing the concept for your home. If you are concerned that your design might be controversial in any way, take steps now to iron out those concerns or change your design.
If you have any concerns, contact your the building department for your site, or engage a planning or zoning consultant to do this on your behalf.
This may be important for heritage projects or avant-garde designs.
The Playbook is a work in progress. Anything without a link is coming soon.
Phase 1 - Project Preparation
Phase 2 - Design Preparation
Phase 3 - Design
Phase 4 - Construction
Your Contractor / Builder
Your Contract
Building Your Home

