- Home
- Hand Drawing Tools
- Draw Floor Plans on Paper
Draw Floor Plans on Paper
There are many software packages available to draw floor plans but if you don’t want to use one (or like me don’t want to use one all the time) then this page tells you how to use paper to draw your floor plans.

When to use software and when to use paper
I like to use a combination of both software and paper based tools. At the beginning of the process if you're trying out lots of ideas I find that it can be quicker to do this on paper rather than with software. When you like an idea and want to see if it works in exact dimensions then it's quicker with software.
Deciding on units and scale to draw floor plans
The first things to figure out before you start drawing your floor plan is what units and scale you are going to use.
Units
Are you going to be working in feet and inches (the imperial system) or in millimeters, centimeters and meters (the metric system)?
This decision will probably be made by the country where your home is. In the US it tends to be the imperial system. In the UK and Australia it's more common to work in the metric system. Canada's a bit of a mix but officially metric.
Scale
Now let's look at the scale. To decide on the scale you need to decide what size of paper you're going to work on.
If you're working on your whole home or just a section or room you'll need to make sure that you can fit the space that you are designing onto the paper.
Most finished architectural drawings are on very large size paper which isn't going to be practical for until final drawings stage.
I'd suggest working on letter (8.5" x 11") sized paper if you're in the US / Canada and A4 sized paper if you're in Australia / UK. I like this size because it's very easy to carry it around, it fits easily on a desk or a table and there's no need to roll it. Unless your new home is going to be pretty big, you'll be able to fit your design on this size paper using a sensible scale.
The tables below show what size house you can fit on what size paper with which scale for the imperial system and the metric system.
Imperial
I have included common paper sizes starting from small to large.
|
Paper size |
Scale |
Max design dimensions |
|
Letter (8.5 x 11") |
1/4 inch to a foot (1/4"=1'0”) 1:48 |
34 x 44ft |
|
Letter (8.5 x 11") |
1/8 inch to a foot (1/8"=1'0”) 1:96 |
68 x 88ft |
|
Letter (8.5 x 11") |
1/12 inch to a foot (1/12"=1'0”) 1:144 |
102 x 132ft |
|
Letter (8.5 x 11") |
1/16 inch to a foot (1/16"=1'0”) 1:192 |
136 x 176ft |
|
Tabloid (11 x 17") |
1/4 inch to a foot (1/4"=1'0”) 1:48 |
68 x 88ft |
|
Tabloid (11 x 17") |
1/8 inch to a foot (1/8"=1'0”) 1:96 |
136 x 176 ft |
|
Tabloid (11 x 17") |
1/12 inch to a foot (1/12"=1'0”) 1:144 |
132 x 204ft |
|
Tabloid (11 x 17") |
1/16 inch to a foot (1/16"=1'0”) 1:192 |
176 x 272ft |
|
Arch D (24 x 36") |
1/4 inch to a foot (1/4"=1'0”) 1:48 |
96 x 144ft |
|
Arch D (24 x 36") |
1/8 inch to a foot (1/8"=1'0”) 1:96 |
192 x 288ft |
|
Arch D (24 x 36") |
1/12 inch to a foot (1/12"=1'0”) 1:144 |
288 x 432ft |
|
Arch D (24 x 36") |
1/16 inch to a foot (1/16"=1'0”) 1:192 |
384 x 576ft |
Metric
|
Paper size |
Suggested scale |
Max design dimensions |
|
A4 (21 x 27.9cm) |
2cm to 1m 2cm = 1m 1:50 |
10.5 x 13.95m |
|
A4 (21 x 27.9cm) |
1cm to 1m 1cm = 1m 1:100 |
21 x 27.9m |
|
A4 (21 x 27.9cm) |
1cm to 2m 1cm = 2m 1:200 |
42 x 21m |
|
A3 (29.7 x 42cm) |
2cm to 1m 2cm = 1m 1:50 |
13.95 x 24m |
|
A3 (29.7 x 42cm) |
1cm to 1m 1cm = 1m 1:100 |
21 x 27.9m |
|
A3 (29.7 x 42cm) |
1cm to 2m 1cm = 2m 1:200 |
42 x 21m |
|
A1 (59.4 x 84.1cm) |
2cm to 1m 2cm = 1m 1:50 |
29.7 x 42.05m |
|
A1 (59.4 x 84.1cm) |
1cm to 1m 1cm = 1m 1:100 |
59.4 x 84.1m |
|
A1 (59.4 x 84.1cm) |
1cm to 2m 1cm = 2m 1:200 |
118.8 x 168.2m |
Graph paper, tracing paper and an architects’ scale are really useful tools. You can buy them in the HPH Shop.

A tip for your scale ruler
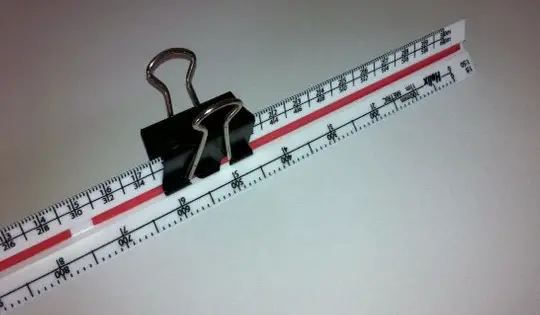
Architects scales are a triangle shape. I use a clip on top so that it's easy for me to find the side I'm using because I know which side of the ruler should be up.
How to draw the floor plan
Take a look at design your own floor plan to figure out the spaces in your home, then come back here.
Exterior Walls
Start by drawing the exterior walls of the house. It can help to start with a basic outline of the house – say a basic rectangle and then add on to this any bump outs. If you’ve got internal measurements rather than external ones figure out what the wall thickness is. This will vary depending on the construction method of the walls. Interior walls are usually about 4 1/2 inches thick and exterior walls around 6 1/2 inches. If you’re about to draw floor plans for an existing home measure the thickness of the walls at the doors and/or windows.
Interior Bones
Next we move inside. It makes sense to start on the main floor. At this stage you want to add in the only the bones of the house. That is any walls that you think are going to be load bearing. If you’re designing or modifying a house plan or remodeling only draw in the walls that you know you’re going to keep.
Once you've got your bones done you're finished on this piece of paper.
Get out the tracing paper
So this is the secret of the professionals. Get your home bones sheet and put tracing paper over the top. You can use a tracing paper roll or a tracing paper book. The pros use a roll but I like a book because the seam of the book helps to keep the page in place. The you can just trace over the top of the bones and work on the rest of the spaces in the floor plan.
 Using tracing paper to draw floor plans
Interior Spaces
Fill in the remaining interior spaces. It works best if you start with the largest spaces and work down to the smaller spaces.
Kitchen and Bathroom Layouts
Add in the layout for your kitchen and bathroom. I have a page about how to draw floor plan symbols which covers everything you'll need for this.
Remaining Details
If it hasn't come naturally to put in doors and windows as you do put them in how.
More hand drawing home design tools
Here's the pages available on hand drawing home design tools.
The following pages might also be useful: Floor plan symbols, Blueprint symbols, Free Floor Plan Software


