- Home
- Hand Drawing Tools
- Bubble Diagrams
How to draw bubble diagrams
If you want to get involved with your home design, chances are you'll have turned your hand to experimenting with a few floor plan options.
Floor plans are pretty exact - the spaces all have shapes and dimensions.
Before you start experimenting with floor plans, take some time to think purely about the organization, sequencing and relative sizing of the spaces inside and outside your home.
This is done using bubble diagrams. Bubble diagramming is a hand drawing design tool which is a fun, flexible way to play with space and layout without worrying about the exact measurements or details.
With bubble diagrams you can really focus on how rooms and spaces in your new home will connect with each other, ensuring the flow feels just right and that the layout meets your needs. It’s a creative, low-pressure way to try out different configurations for the best possible design.
Architects and design professionals use bubble diagrams during the concept design phase of projects and you can probably see why. They're really intuitive to understand. If you're working with an architect it's a good idea to ask them to run their bubble diagrams by you as this is a great way to provide quickly on a drawing that hasn't taken your architect too long to produce.
Drawing a bubble diagram
Bubble diagrams aren't just for architects. There's no reason you can't have a go too. Here's how to go about it...
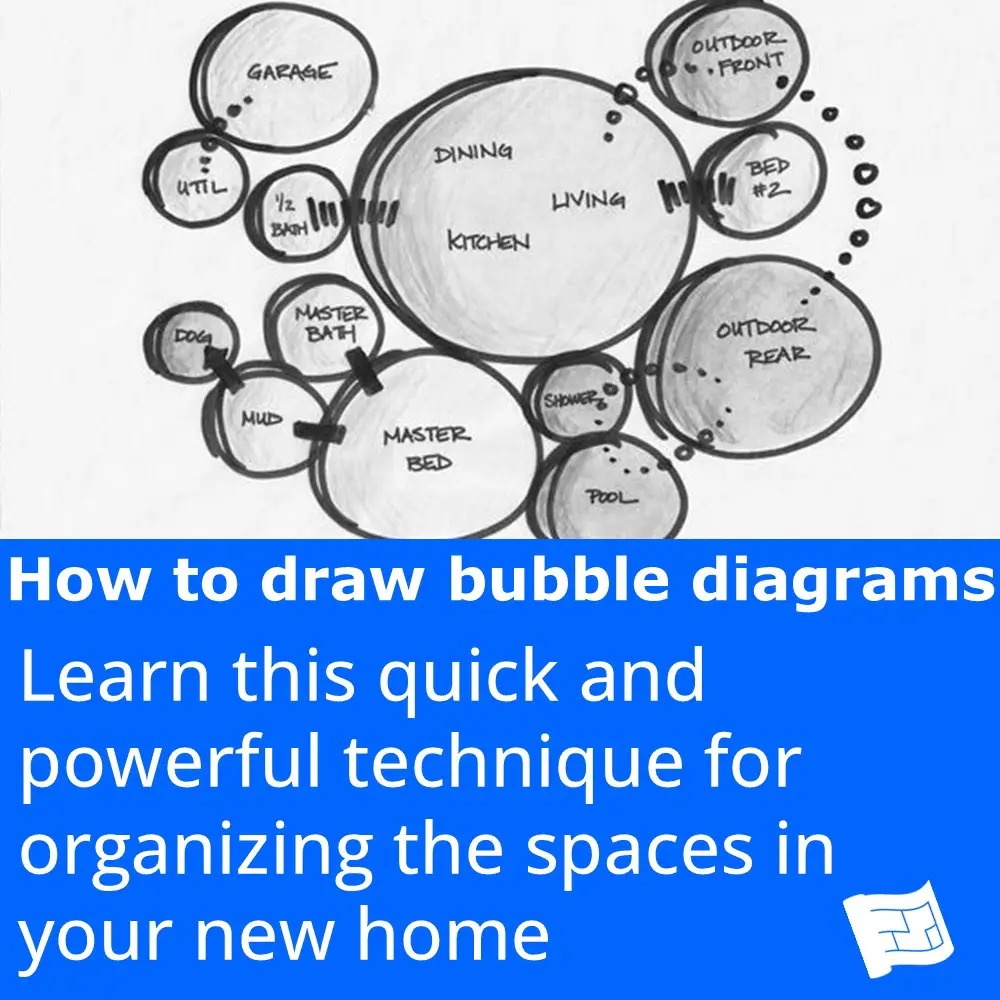
Essentially you'll be drawing circles or ovals (bubbles) which represent the space and arranging them, roughly to fit in with the shape of your footprint.
First of all, here's a few pointers on the format and conventions to use in your diagram.
- It's a good idea use color to show different types of areas for example public and private indoor spaces, car spaces and outdoor spaces.
- Try and size the bubbles so that the spaces roughly represent the amount of area each space will occupy.
- You can use lines to show adjacencies between spaces. Perhaps a solid line for immediate adjacencies and a dotted line to show easy access. You could use a double line to show spaces that are immediately adjacent and open to each other.
- You can use anything else you might find useful.
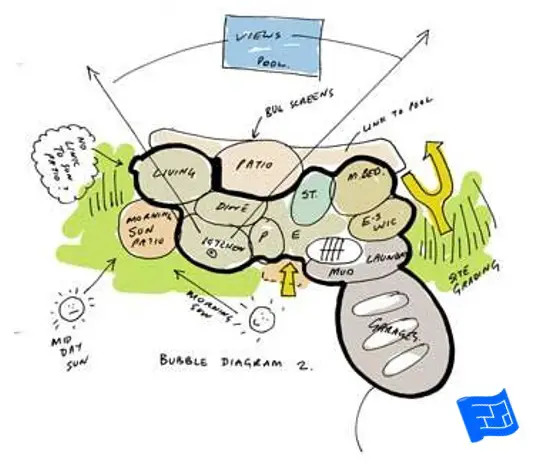
- Long arrows to show a view out from a space.
- Short arrows to show access to the outside.
- It can also be useful to indicate which rooms need plumbing. A wavy line roughly where you think the plumbing will be for spaces that need it can help you get an efficient layout for your plumbing.
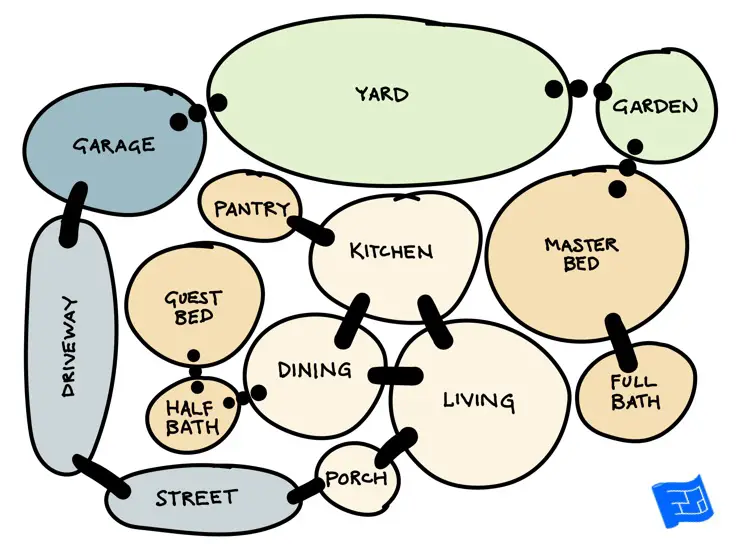 This bubble diagram uses colors for public, private and cars along with solid lines to show immediate adjacencies and dotted lines to show easy access.
If you have an existing home, have a think about what space could be re-organized and what space must stay as it is. This decision is usually driven by your budget.
Here's a few reminders about what to do - remember it's an iterative process and you should try out lots of ideas.
- Write down all the spaces you want to include in your new home. If you like you can also have some bubbles which refer to an activity rather than a space. Don't forget to include outdoor living spaces.
- Think about how you want to group the spaces - generally in public and more private areas which is typically a split between living space and bedroom space. Sometimes the bedroom space can be in several different zones such as master bedroom and kids bedrooms and perhaps an additional zone for guests. Figure out where the zones will go first.
- Think about which spaces you want in the north, south, east or west. Find out more about orientation.
- Figure out your access (driveway and pedestrian) and the location of any parking if applicable.
- Where will your main entrance be? Will any other spaces have access to outside?
- Remember elements that have an impact on two floors. So next think about the placement of the stairs and fireplaces. If you want to be efficient with your plumbing, try and stack the bathrooms on top of each other.
- Then you can work out where the other spaces connect into these spaces.
- Indicate the connections and adjancencies between spaces. If your adjacency lines are crossing this is a strong indicator that you need to rethink your layout.
You can use pen and paper, a software package (I use PowerPoint) or even post-it notes as described in design your own floor plan.
Remember to save your ideas as you try out different bubble arrangements.
Resources
I've curated two videos for you on bubble diagrams. Have a look at them both and then have a go at your own bubble diagram.
My favorite bubble diagram video is from Mimi Estelle Design. She goes through the bubble diagram process showing how it ends up as a floor plan. I'd like to make a few changes to the design that she finishes up with (you'll learn how to spot these in the next section of the course) but it's a good video on how to do bubble diagrams.
Here's a few examples from Luis Furushio which show the progression of bubble diagram to floor plan. The second example has a few images to click through.
More hand drawing home design tools
Here's the pages available on hand drawing home design tools.
The following pages might also be useful: Floor plan symbols, Blueprint symbols, Free Floor Plan Software

