- Home
- How to Read House Plans
- How to Read Site Plans
How to Read Site Plans
In order to learn how to read site plans, let's look at what information you can expect to see on a site plan.
This page forms part of the how to read house plans series.
We're going to start out from the property line and gradually go through all the features on the site plan to build up to the final site plan with the location of the house shown.
I'm going to use some color to help explain things but many site plans are drawn in black and white.
I haven't used much text on the site plan to keep it clutter free. Usually site plans will have a few explanatory notes on them to describe the features or buildings.
Property line
The property line is the boundary of the site or lot with adjacent properties.
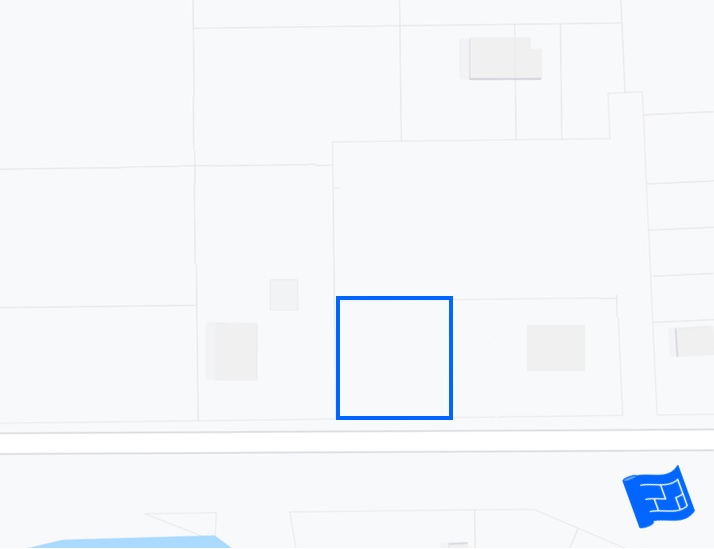
The site of our case study home is a square shape.
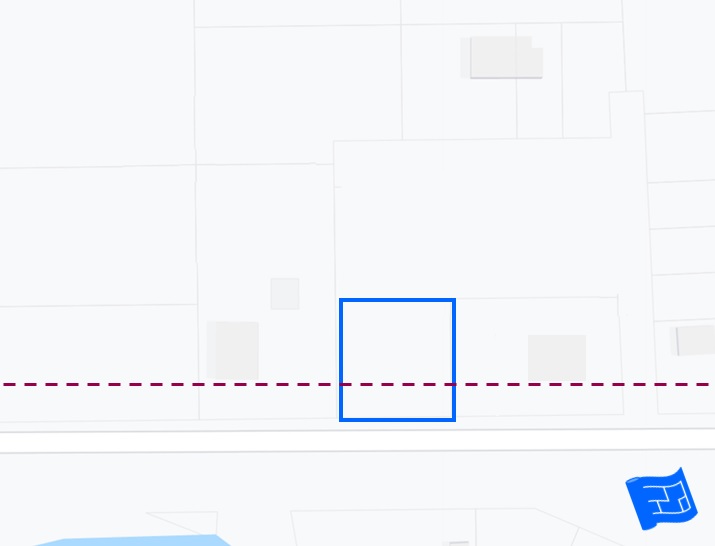
It's important to learn how to read site plans in the wider context of the surroundings around the site. We can see the site here with the neigboring properties.
You can see how the property line is slightly set back from the street.
At the bottom right of the picture you can see some blue. Let's take that to be a small body of water which is a nice view.
How to read site plans - measurement basics
There are a few basics that you'd expect to see on the site plan.
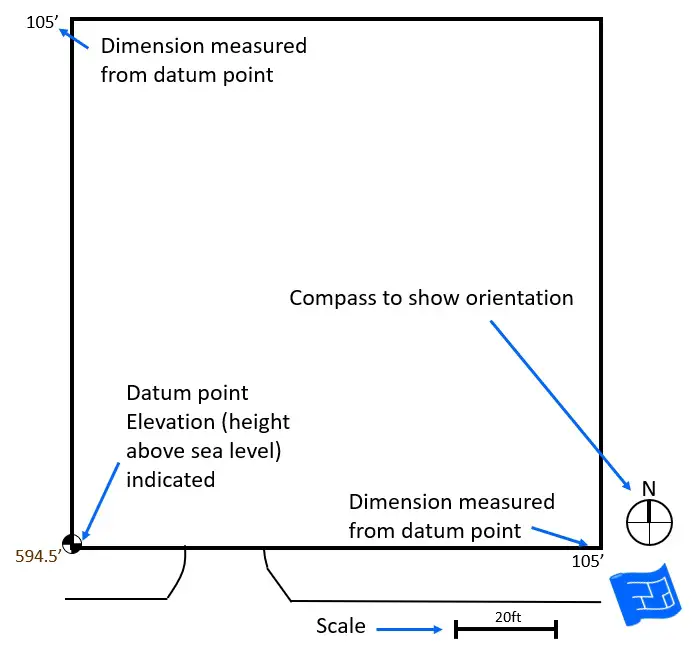 Site plan showing the measurement basics - datum point, dimensions, elevation, scale and orientation
Datum point
The datum point is the place on the plan to which all measurements on the plan (dimensions and elevations) are referenced to.
Dimensions and elevation
The dimensions of the site are measured from the datum point and marked on the site plan.
The elevation (height above sea level) is indicated at the datum point.
Scale
The scale makes it possible to measure distances on the site. This becomes more important when we start to put setbacks and easements onto the site plan (keep reading).
I've used a bar scale on our site plan. You may also see the scale expressed numerically eg 1 inch to 10 feet (1:120) or similar.
Orientation
It's important to know the direction of North so that we can determine where the sun will be shining.

Driveway
I forgot to mention that this site had a home on it previously, so there is already a cut in from the street to the driveway.
Natural features
So now that we've got the basics in place, it's time to move on to how to read site plans with any natural features such as a slope, trees and any bodies of water.
There's no ponds, or streams on the site itself.
The site backs onto some woods and also has some trees more towards the front of the site which provide a bit of privacy from the road.
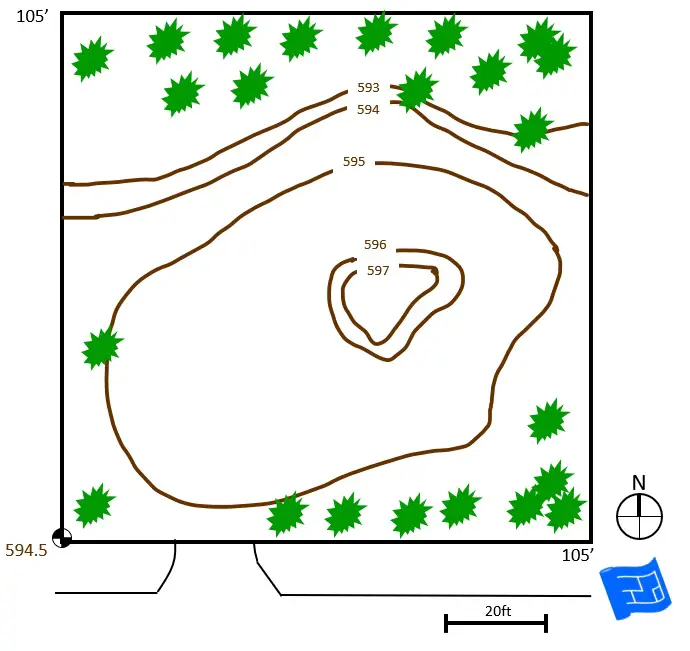
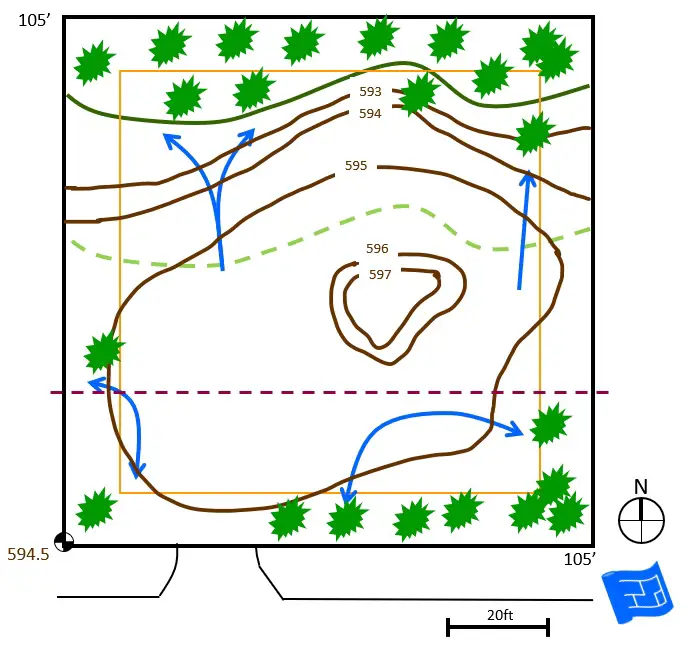
There is a slight slope on the site. The slope is mapped out using contour lines. Each contour line follows land that's the same elevation above sea level. You can see that the elevation of each contour is marked.
To mark the contour lines, the surveyor will split the site into say a grid with squares every 20ft and will use an altimeter to record the elevation at each point on the grid. The contour lines can then be plotted.
An altimeter is just an instrument that can measure the height above sea level. You can get an app for it on your phone if you're interested.
On our site plan, the contours are marked off every foot of elevation. The closer together the contour lines, the steeper the slope.
Setbacks
Setbacks are to do with the amount of space which must be left between the built structure and other places and features on the property such as the property boundary, the street and natural features that need protection.
They're an important thing to look out for when you're figuring out how to read site plans.
Setbacks are set by the local planning department.
Let's look at the setbacks on our case study home.
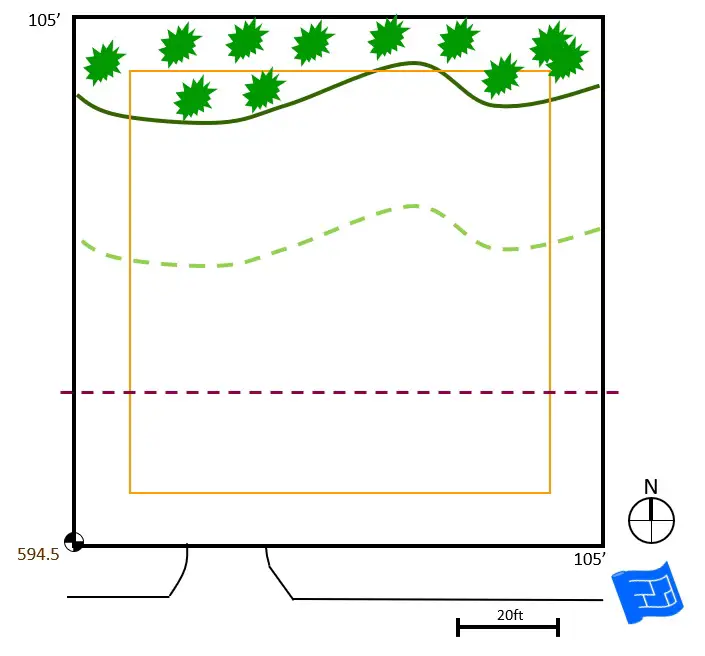
- The orange line shows these minimum set backs from the property boundary. This might be a setback or an easement requirement. See easements below.
- The dark green line is the boundary of the woodlands which lie to the North of the property. Let's say the planning department imposes a woodland buffer. The light green line indicates the extent of this buffer. You can see how it reflects the shape of the woodland boundary.
- The burgundy dashed line shows the setback of the neighboring houses. This requirement is set by the planning department. You can see the setback line for our site and the neighboring properties below.
Easements
An easement is a part of the land which the landowner owns but another party has the right to use it for a particular purpose.
There are some drainage easements on our case study site indicated by the blue arrows. Whatever is built on the site mustn't interfere with this drainage.
Utilities
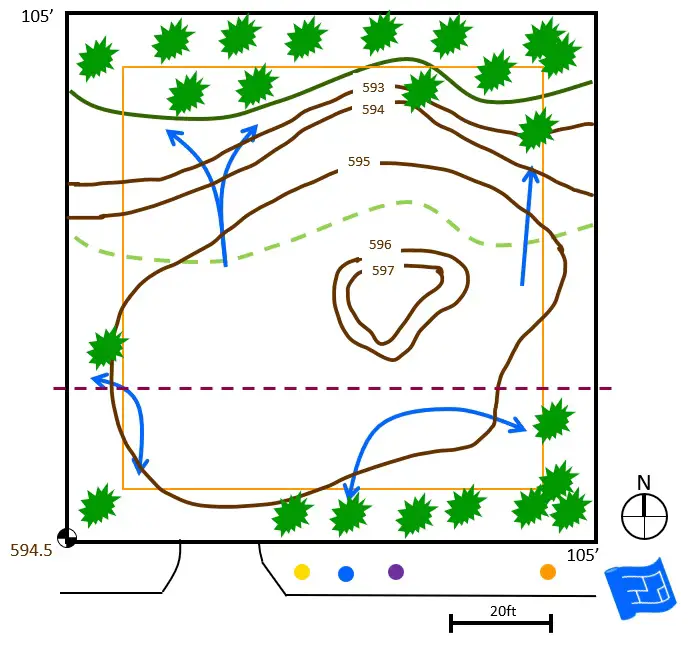
A site plan should show where access to services will be granted. This includes electricity, gas, water and sewers.
In our case study house the point at which the mains water can be accessed is the blue dot, similarly for electricity (yellow dot), gas (purple dot) and sewer drain (orange dot).
I guess in this day and age it would also be good to include the internet as a utility.
Placing the home on the site plan
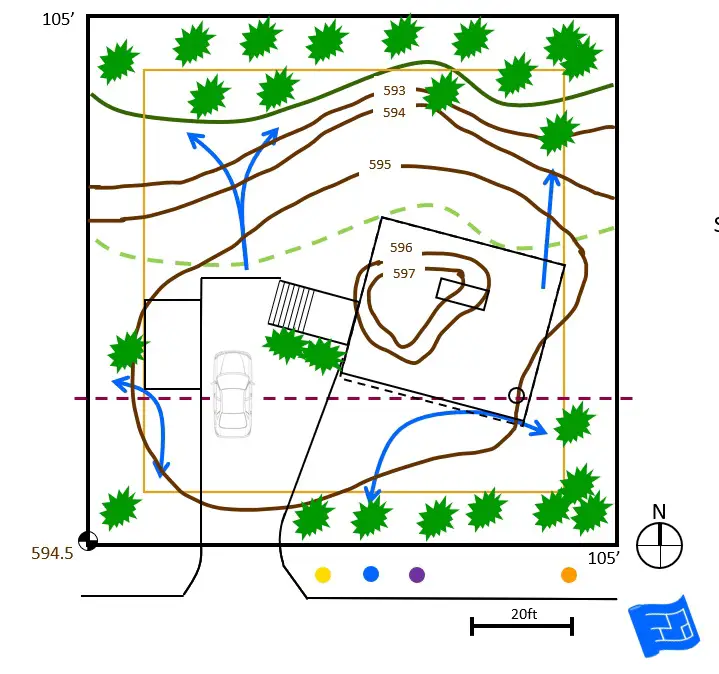
So now that we have learned how to read site plans, let's have a look at the home placed on the site.
When all the setbacks are taken into account we can see that the area of the site where building is allowable is not all that big. The majority of the site is in fact out of bounds for the house!
So when we take into account the area where building is allowed, along with the views to the south east that we saw from the neighborhood site plan what is the best place for the house to be placed?
Aa modest sized home, faced towards the view can be placed in the position shown. We can see the roofline of the home, the driveway and an outbuilding to the east of the property.
You may notice that the corner of the property overlaps the burgundy setback line. The view of the property from above shows the roof line. The interior of the home at the front is set back under the roof to create a balcony, so in fact, there's no interior space that overlaps the setback.
You'll be able to see that more when we look at how to read the floor plan.
So, I hope that has taught you how to read site plans. This knowledge enables you to imagine what the house will be like in it's surroundings once it's built.

